Updates to the sample payment plugin

We’ve just updated the sample payment plugin. Release 2.0 features an improved design (based on Bootstrap), simplified configuration and some fixes to the build process.

Sample_payment_plugin

The sample payment plugin is intended for:

  • Site owners who want to test the NetDimensions Learning payment process in the absence of a real payment gateway; and
  • Developers who want to understand the protocol by which NetDimensions Learning communicates with a payment gateway.

We hope this new release helps you to get NetDimensions Learning up and running with the payment gateway of your choice.

Recent activity

Talent Suite’s Recent Activity home page widget and associated gadget provide learners with a view of their classmates’ activity on the site, whether taking courses or participating in discussion forums.

As of Talent Suite 11.1 build 996, the recentActivity API function provides an alternative way to embed this information in another site or app.

As with other API functions, recentActivity can return information as JSON or XML. Sample responses are shown below.


{
"items": [
{
"type": "complete",
"published": "2015-09-08T12:02:48.391+08:00",
"actor": {
"url": "https://preview.netdimensions.com/preview/servlet/ekp?TX=BIO&DECORATEPAGE=Y&PX=Y&PS=Y&USERID=zechariah.law",
"displayName": "Zechariah Law",
"image": {
"url": "https://preview.netdimensions.com/preview/nd/fresco/images/decorate/shadow_person.png"
}
},
"object": {
"url": "https://preview.netdimensions.com/preview/servlet/ekp?CID=73491_eng&TX=FORMAT1&LANGUAGE_TAG=0",
"displayName": "Developing JSPs (73491_eng)"
}
}
]
}


<items>
<item>
<type>complete</type>
<published>2015-09-08T12:02:48.391+08:00</published>
<actor>
<url>https://preview.netdimensions.com/preview/servlet/ekp?TX=BIO&amp;DECORATEPAGE=Y&amp;PX=Y&amp;PS=Y&amp;USERID=zechariah.law</url&gt;
<displayName>Zechariah Law</displayName>
<image>
<url>https://preview.netdimensions.com/preview/nd/fresco/images/decorate/shadow_person.png</url&gt;
</image>
</actor>
<object>
<url>https://preview.netdimensions.com/preview/servlet/ekp?CID=73491_eng&amp;TX=FORMAT1&amp;LANGUAGE_TAG=0</url&gt;
<displayName>Developing JSPs (73491_eng)</displayName>
</object>
</item>
</items>

Possible values for type are as follows.

  • enroll (in a module)
  • start (a module)
  • complete (a module)
  • create (a forum topic)
  • reply (to a forum topic)

We hope that this new API function helps you to add a more social dimension to your site or app.

Whatever happened to onBehalfOf?

API functions that use user authentication support an onBehalfOf parameter. The idea behind onBehalfOf is that the caller authenticates using privileged credentials (corresponding to a Talent Suite user account with the Switch User permission), and specifies the ID of the user on whose behalf the call will actually be executed. Thus an application such as a portal can make API calls on behalf of an end user without having to obtain that user’s credentials.

onBehalfOf has limitations however. For one thing it can only be used by applications that are capable of keeping the privileged credentials secret, which in practice typically means applications that run on a server. It also requires a high degree of trust in the application, since an application with privileged credentials can make API calls on behalf of any user, without explicit authorization from the user.

As of version 10.0, Talent Suite supports OAuth. OAuth provides a Web-based flow via which an application can request an access token, which it can then use to make API calls on behalf of the end user. OAuth eliminates the need for privileged credentials, and provides more control over how authorization is granted. We recommend using OAuth for new development.

Since OAuth eliminates the need for onBehalfOf, we no longer show the corresponding form fields by default in the API explorer. However, we recognize that these fields can sometimes be useful for testing purposes. If you want to see these fields in the API explorer, simply append an onBehalfOf query string parameter to the API explorer URL, i.e. api/?onBehalfOf=. Moreover, if you specify a non-empty value for the parameter, e.g. api/?onBehalfOf=lucy, then this will be used as the default value for the onBehalfOf fields.

The Batch Report Downloader

Update: version 1.1 supports an optional argument to limit the number of reports downloaded.

The Talent Suite API includes functions for listing and downloading a user’s batch reports. In combination with the report scheduler, this provides an extremely flexible way to export data from the system. Assuming the data you need is available either in a standard report or via the Report Wizard, simply schedule the relevant report to run periodically (for automated processing you’ll most likely want to specify CSV as the output format), then use the API to fetch the generated reports.

The Batch Report Downloader is a simple Java command-line utility that demonstrates this capability. It is provided as a self-contained executable JAR file. You can run the downloader as follows. (The optional parameter specifies the maximum number of reports to download, which will be the most recent.)

java -jar batch-report-downloader-1.1-jar-with-dependencies.jar     

The example below downloads at most the three most recent batch reports for user johndoe to the current working directory.

java -jar batch-report-downloader-1.1-jar-with-dependencies.jar https://www.example.com/ekp/ johndoe mypassword . 3

You can always call the utility from a shell script. If you want to get more adventurous, source code is here.

Displaying Talent Suite modules and catalogs in a portal

If your community of users has an existing portal, you might want to let them see information about Talent Suite modules and catalogs directly in the portal instead of requiring them to access Talent Suite.

One simple way to do that is to use the Latest Courses gadget, which makes it possible to include information about new courses simply by copying a snippet of HTML markup into the source code of your site.

For those comfortable with a little programming, however, the Talent Suite API offers much more flexibility. In particular, the following API functions would be relevant.

api/catalog
Returns the contents of a catalog.
api/modules
Returns information about a specific module.
api/module
Returns a list of modules matching specific search criteria.

You can find more information on the above API functions by going to Manage > Developer Tools > Talent Suite API in your Talent Suite site.

The following code samples might also be relevant.

You can combine the above techniques with the Checkout API to create a custom storefront from which your customers can buy your courses.

Supporting custom storefronts with the Checkout API

Suppose you’re selling courses managed by NetDimensions Learning. Using the Talent Suite API, you could create a custom storefront that would let your customers browse and search for your courses. You could also incorporate a shopping cart so that customers can collect multiple courses that they can purchase in a single transaction.

But what about when it comes time to check out? How do you ensure that Talent Suite handles the payment correctly, and makes the courses available to the customer after the payment is successful?

Starting from 10.1 build 1521, Talent Suite supports the Checkout API, a new, streamlined checkout process for use with custom storefronts. The Checkout API is compatible with all supported payment gateways and plugins.

To use the Checkout API, your shopping cart will need to record an item ID value for each item in the cart. The item ID is available for each module session returned by api/module, e.g.:

<itemId>course1/EKP000000200</itemId>

Once the customer is ready to pay, you can redirect them to servlet/ekp/checkout (relative to the base URL of the site; for example, the full URL might be https://www.example.com/ekp/servlet/ekp/checkout, passing the following query string parameters in the URL.

Name Value Example
cart Space-delimited list of item IDs course1/EKP000000200 course2/EKP000000400
onSuccess URL to which the customer will be redirected after a successful payment (optional) https://store.example.com/success
onFailure URL to which the customer will be redirected if the payment is cancelled (optional) https://store.example.com/cancel

After percent-encoding the parameter values, the full URL would look as below.

https://www.example.com/ekp/servlet/ekp/checkout?cart=course1%2FEKP000000200+course2%2FEKP000000400&onSuccess=https%3A%2F%2Fstore.example.com%2Fsuccess&onFailure=https%3A%2F%2Fstore.example.com%2Fcancel

Note that both onSuccess and onFailure must, if provided, refer to a trusted app.

Talent Suite will initiate the configured payment process, and make the selected courses available to the customer if payment is successful.

By using the Checkout API together with a payment plugin, you can customize the entire shopping process, from storefront to completion of payment.

We hope this new checkout process provides a smoother experience for your customers, and helps them get to your content faster.

Trusted apps

Talent Suite’s OAuth support enables any app or website to request an access token. In general, when an app requests an access token, Talent Suite will ask the user whether they want to authorize the app; it’s up to the user to decide whether to grant access.

Authorize app?

Sometimes, however, you’ll want to allow an app to access a user’s account without requiring explicit authorization from the user. You can do this by designating the app as a trusted app.

You can configure trusted apps by navigating to System Configuration in the Manage Center, and selecting the Security Management category. Configure each trusted app as a URL, which Talent Suite will compare with the redirect_uri provided by the app when it requests a token. We recommend configuring the full URL; however, the redirect_uri is considered to be trusted if the scheme, host and port match exactly, and the trusted app URL path is a prefix of the redirect_uri path.

Trusted apps

OAuth

For API functions that support user authentication, Talent Suite supports (from release 10.0) a token-based authorization mechanism based on OAuth 2.0. This enables users to obtain an access token using a browser-based flow, and to use this token to authorize API calls.

Why use token-based authorization?

  • Token-based authorization decouples API authorization from the primary sign-on mechanism. In particular, token-based authorization is compatible with single sign-on mechanisms such as SAML.
  • Token-based authorization enhances security since users aren’t required to share their passwords with third-party applications, nor do such applications need to be granted access to privileged credentials.
  • Token-based authorization enables users to revoke authorization granted to specific apps or sites, without changing their primary login credentials (e.g. password).

How does token-based authorization work?

The app generates an unguessable state value and stores this, for example in a cookie in the case of a browser-based app. This value is used to defend agains cross-site request forgery attacks, as per section 10.12 of the OAuth 2.0 specification.

The app then redirects the user to servlet/ekp/authorize, including response_type, client_id, redirect_uri and state query string parameters. The value of response_type should be code. Talent Suite does not require client registration, therefore the value of client_id should be set to anonymous.

As of release 10.0, Talent Suite does not define any scopes. Therefore the scope parameter defined in OAuth 2.0 may be omitted.

For example, assuming a redirect_uri value of https://client.example.com/cb, the app redirects to https://ekp.example.com/ekp/servlet/ekp/authorize?response_type=code&client_id=anonymous&redirect_uri=https%3A%2F%2Fclient%2Eexample%2Ecom&state=xyz.

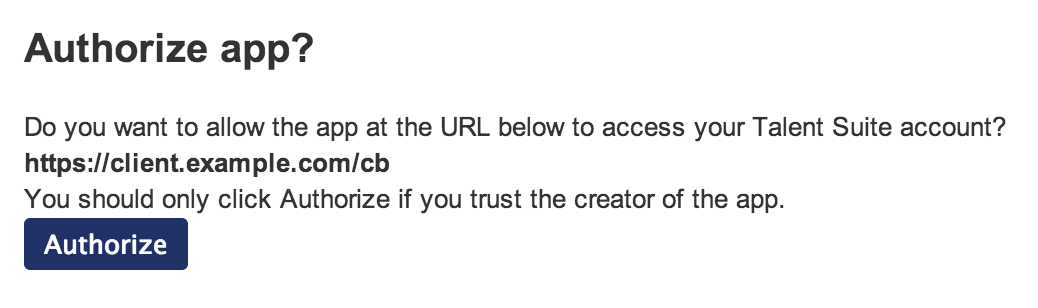
After signing in the user and obtaining authorization, Talent Suite redirects the user back to redirect_uri, passing an authorization code and the state value, for example https://client.example.com/cb?code=EKP000010561-35f8fa2b8864bf3d4efdbf07c88a17ff85a51143-ef0447f1c736150c17788c705cae1c84186cef0e&state=xyz. The app checks that the state value matches the value passed, rejecting the response otherwise.

The app then exchanges the authorization code for an access token by sending an HTTP POST request to servlet/ekp/token with parameters grant_type, code and redirect_uri. The value of grant_type should be authorization_code. The values of code and redirect_uri should be the returned authorization code and original redirect_uri respectively. Note that this request does not require client authentication; in particular, client_id and client_password are not required. Assuming that code and redirect_uri are valid, the app receives a JSON response similar to the following.

{
  "access_token": "EKP000010562-d0122ba7466f0e41942fed6273a5fc30991dc2ef",
  "token_type": "Bearer"
}

The app can then authorize API calls by including an Authorization HTTP request header with the scheme of Bearer, for example:

Authorization: Bearer EKP000010562-d0122ba7466f0e41942fed6273a5fc30991dc2ef

Access tokens do not themselves expire. However an access token cannot be used if the account of the user who authorized it expires or is marked as inactive.